
 Image via Shutterstock
.jpg) Image via Shutterstock
Image via Shutterstock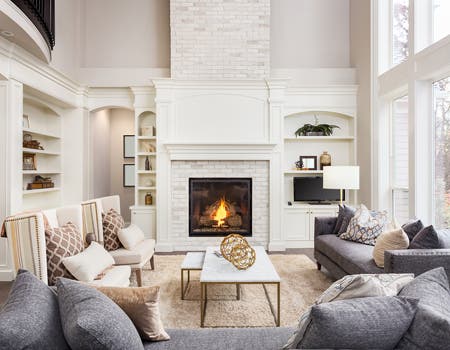 Image via Shutterstock
- Tin tức
Final Thoughts
06/05/2026 | Posted by: Admin

03/07/2021 | Posted by: by Admin
Professional real estate photography may not be a popular entry-level niche for beginners, but taking real estate photos can be a very lucrative gig for serious shooters.
As with fashion photography, high-quality images are a must for real estate listings. Each property photo will only have a few crucial seconds to make a good impression. This is why most landlords and realtors hire professionals who can provide quality images that will help their listings stand out in the competitive market.
There’s really no shortage of articles and workshops that can teach you about photography. But if you’re hoping to shoot real estate, you ought to remember these tips below.
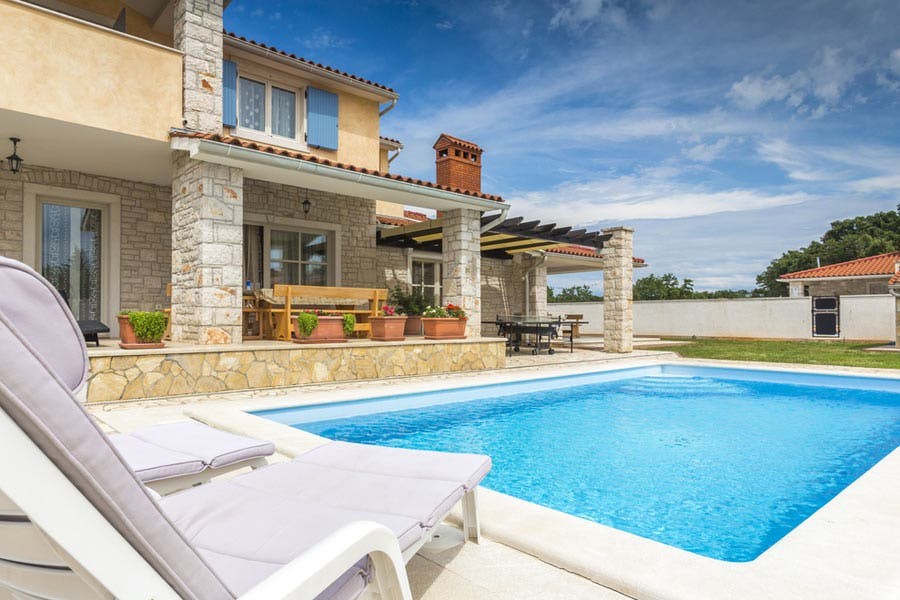
Image via Shutterstock
In this article, we’ll help you complete your photography gear, understand how a pro real estate shooter does his work, avoid mistakes that beginners often make, produce photos worth a thousand words (and dollars!), and attract more clients with your enhanced credibility as a real estate photographer.
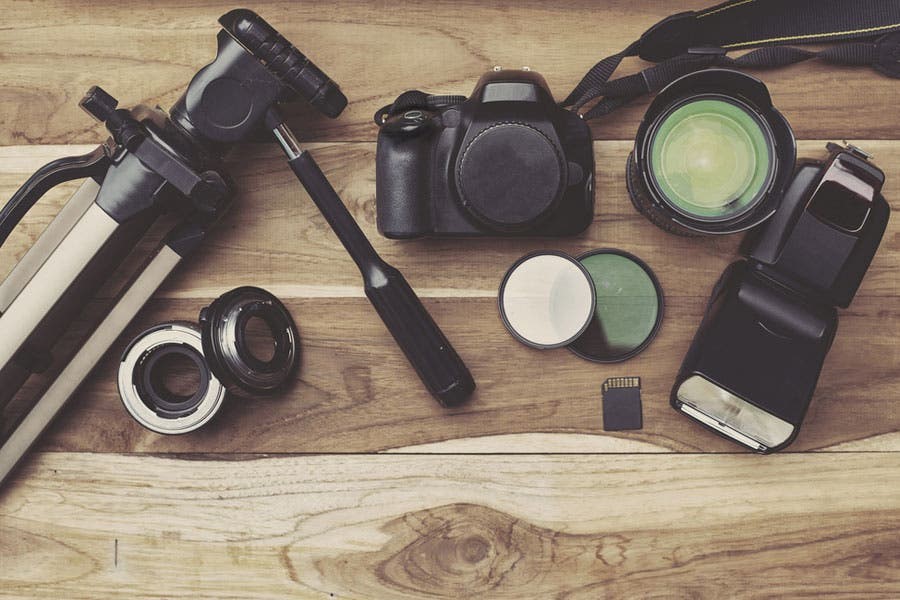
Image via Shutterstock
The first thing you’ll need, of course, is a decent set of photography gear specifically for real estate photography. This means you’re not supposed to use just any camera, lens, or any other accessory until you’re sure that they will be of good use for the job. We’ll get into detail below:
You’ll need to take high-quality images, so equip yourself with a reliable DSLR or mirrorless camera for real estate photos. One with a crop sensor would do. But the wider field of view of a full-frame camera would be preferable considering real estate photos typically feature wide-angled shots to include more of the surroundings.
You can play around with your settings. But ideally, you should use a shutter speed of 0.5-1/60 seconds, an aperture between f/8-f/11 (for sharper details), and an ISO of 400 and below.
While you may already have a camera lens (the one that came with your camera), it may not be the right lens for the job. You’ll probably need to rent or purchase a wide-angle lens, ideally with focal lengths ranging between 10mm to 24mm for full-frame cameras. But don’t just get the widest lens possible—get one that can give you an excellent wide-angle range, as well as a separate prime for sharper details.
If you can afford it, invest in a good tilt-shift lens that can help you correct distortions and achieve straighter vertical lines without the need for photo editing programs.
A tripod is generally useful when you’re shooting at slower shutter speeds because the slightest camera shake can leave you with very blurry shots. And if you’re shooting real estate, you’re going to appreciate the much-needed convenience that a tripod can provide.
Use a tripod to keep your camera in place while you make slight changes in your angle of view and focal range. It will also help you in taking overhead shots, which would obviously be difficult without a tripod.
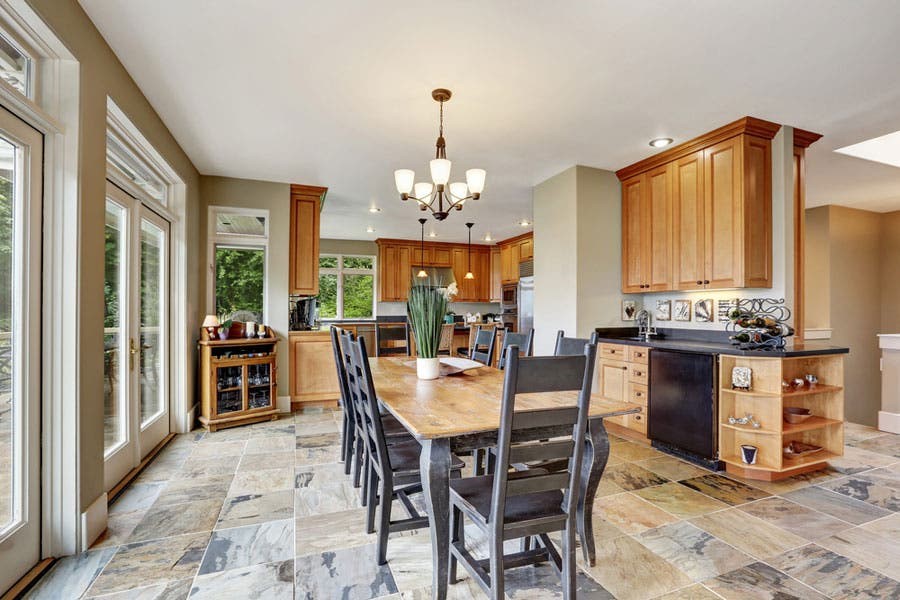
Image via Shutterstock
Now some photographers may be able to get away with just natural light, but only for exterior shots. Once you move further into the house, you may realize that even the rooms nearest to the windows may not have enough ambient lighting for even illumination.
When taking pictures indoors, consider it like any other studio photo shoot. Take existing light sources into consideration, such as the sunlight coming in from the living room windows, ceiling lights, and lamps. Should there be dark areas within the room, use external flashes and make sure you play with the settings to get just the right amount of ambient and flash lighting for your pictures.
Do check your final test shots and make sure you don’t capture any reflections as these can make your photos look amateurish. For more information, check out our article on lighting solutions for architectural photography.
|
|
|
|
|
|
If you want your listing to really stand out, it has to feature the highlights of the home that you will be photographing. That said, you’ll want to make sure that you take spectacular photos of the following areas:
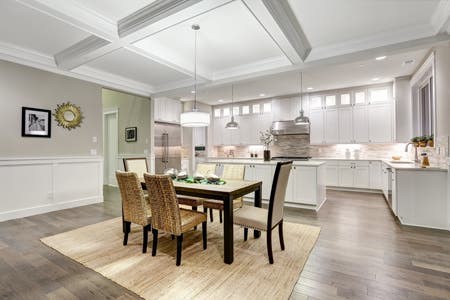
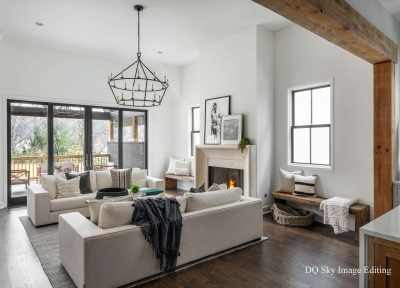
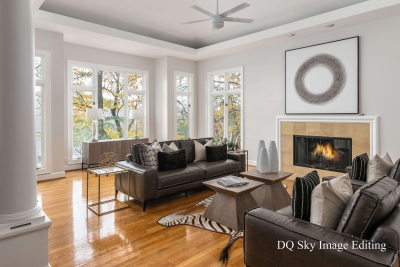
This is considered to be one of the most important pictures in any property listing. You’ll want to make it look as welcoming, as homey, and as spacious as possible. Consider these things when planning your shots.
You’ll want potential clients and tenants to imagine themselves in this room. Make it a point to make it look bright, cozy, and inviting. Angle your shot in a way that also shows off other highlights of the room, such as a stunning view or a spacious closet.
You may decorate your dining table lavishly but keep the kitchen area spotless. You want it to look tidy and functional.
Considering the limited space, it can be very challenging to take photos of bathrooms. Go around and find the best corner for your shoot.
If you’re taking pictures of a house with a spacious yard, don’t put it to waste. Show off the exterior and compose your shot well. This way, you don’t end up making the house look flat, skewed, too small, or unattractive. Don’t forget to remove any dry leaves and trash bins that may be in the shot!
During this time, make the most of your wide-angle lens. Remember to lock your focus on key items (bed, dining table, bathtub, and so on), and keep your lines as straight as possible so the walls don’t end up looking unstable. Also, consider shooting at an angle (instead of capturing your key pieces of furniture dead on) to add visual space and give your viewers something else to look at within the picture.
As a general rule, take pictures of just the house and the rooms. Exclude any people, pets, and kids from the photos. Unless, of course, the realtor who hired you is angling to market the house specifically to families.
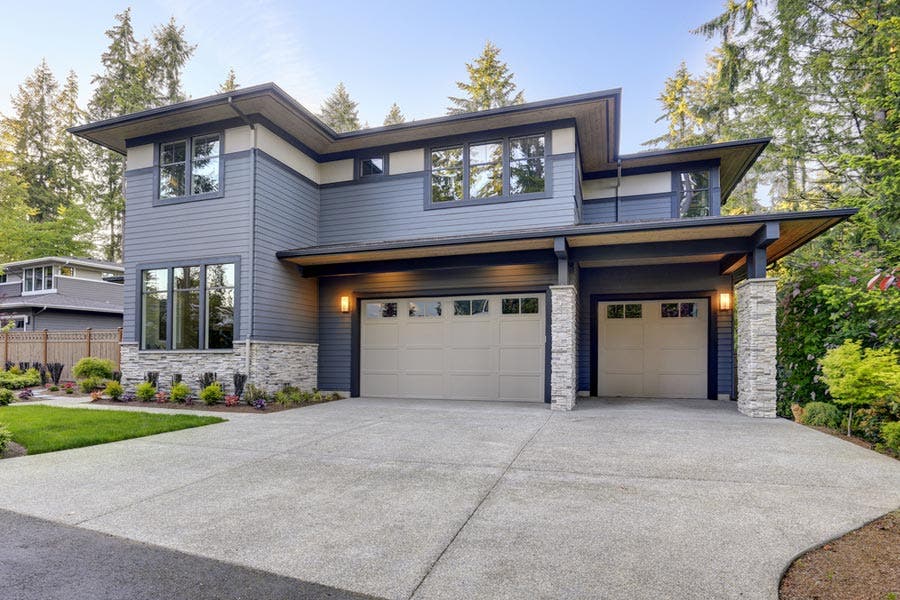
Image via Shutterstock
When shooting exteriors, you’ll want to make sure that the sunlight will give you beautiful, even lighting. Fortunately, the chance of achieving this is much greater when you shoot after sunrise and before sunset—when the sun is not directly above you. During this time, sunlight is more diffused, thus eliminating harsh shadows that can leave unattractive lines on the home’s exterior. Depending on where the house is facing, sunlight can even create dramatic directional lighting for rooms with big windows. Make sure to use this to your advantage.

Image via Shutterstock
Do remember that much of your time as a real estate photographer will be spent taking pictures of old houses, which means it will have furniture and other knick-knacks that belong to the homeowner. Therefore, it’s not enough to be extra careful. Make sure you are covered by your standard liability insurance and are insured as a photographer. This way, you can freely move around and do your work with confidence.

Image via Shutterstock
As a professional photographer, you should always secure a contract before every shooting job. This is where you can make the details of the job clear—from the duration of the shoot and the specific rooms that you’re supposed to photograph to the turnaround time and how much you will be paid—so you know exactly what you’re getting into and can make sure that you will be well compensated for your time and effort.
I mage via Shutterstock
As you may already know as a photographer, there’s no single, perfect choice for camera settings. It helps to have prior experience in shooting a variety of subjects. Then, you can better understand your camera, how to capture light, and learn how to enhance your photos.
What makes an experienced shooter stand out is his or her ability to adapt to different shooting situations. If you’re able to adapt when the light is not working out for your subject, for example, you’ll find success. In the case of real estate photography, you may want to also learn how to create a high dynamic range (HDR) image, either on your camera or during post-processing, to achieve a more detailed and evenly-lit picture when the ambient light is not working in your favor.
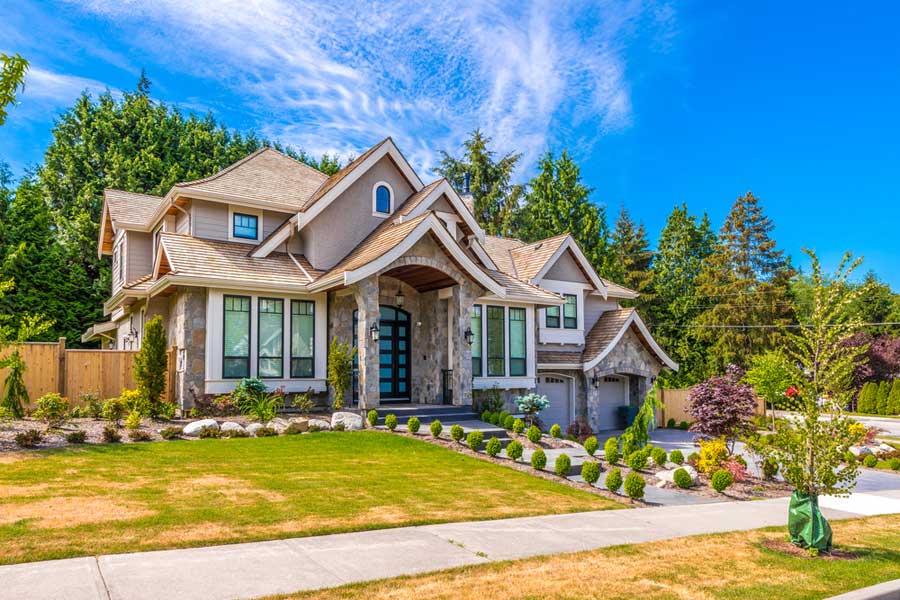
Image via Shutterstock
Taking the photos are said to be just half the battle. Before you proceed to exporting and printing, take the time to scrutinize your best shots. Then, see how you can improve your images further. Choose a photo editing program that you know how to use (although you ought to know your way around software like Photoshop and Lightroom if you’re truly serious about your craft) and load your images up.
To make sure your photos look professionally photographed yet natural-looking, check if you need to perform any of the following:
You should have already corrected your white balance before taking your photos. But if you took shots in RAW format, you can easily do this using your editing program. The goal is to make your photos look as realistic as possible. You don’t want them to look too cold (bluish) or too warm (yellow-orange).
What may have looked straight in your camera can look distorted once your image is enlarged on your computer screen. Make all the necessary edits to ensure that all vertical lines are vertical. You want the house to look stable and your photos look strictly professional.
Should there be areas that are too bright or too dark, manually edit them or use a quick HDR treatment (if your program has it). With this, you’ll achieve a more balanced and even exposure across the image.
Many beginners tend to overdo this, but remember that this photography niche allows you to include a little more of the scene so it looks more spacious and worthwhile to look at. But in case you spot anything near the edge of the frame that doesn’t work with the rest of your image, like a leg of a light stand or a dirty spot on the carpet, crop away—but keep it to a minimum.
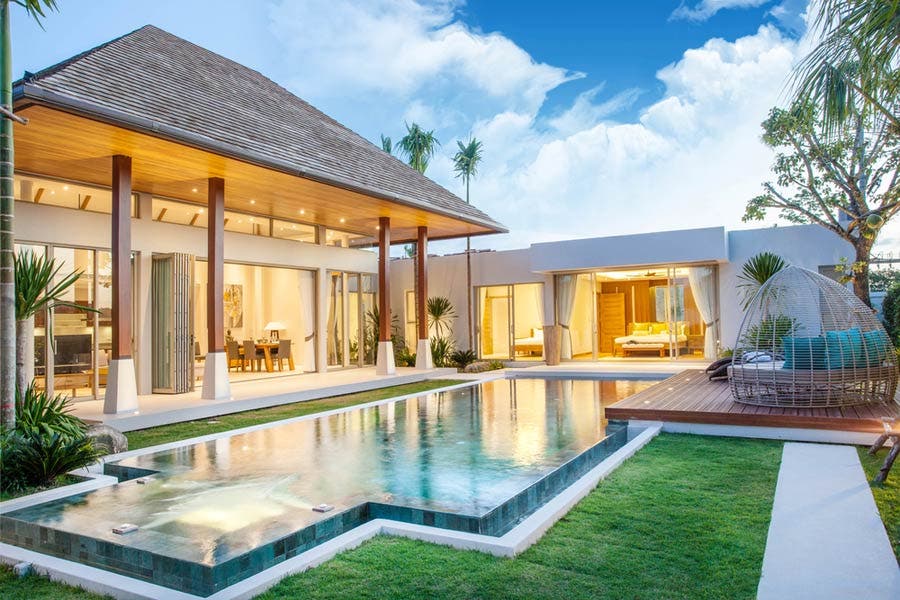
Image via Shutterstock
Not all photographers are talented in post-processing, and that’s okay. It does take time to learn a professional photo editing program, especially on top of mastering your camera’s manual settings. And in case you also need to rush and catch a deadline, don’t be afraid to seek the assistance of a real estate photo editing service.
All you will need to do is hand over the memory cards containing your final picks, pay around $2 to $10 for every photo (depending on the work that you want done), and you can get the edited photos in just a day or two. This is an ideal workflow if you already have a steady stream of jobs. The photography part will generally earn you more than what you spend on editing services.
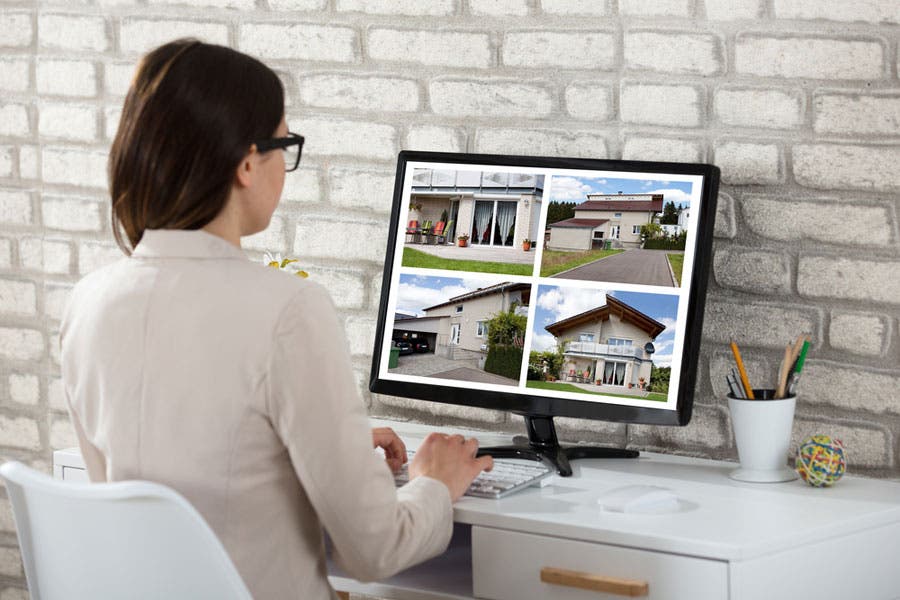
Image via Shutterstock
To help increase your chances of getting hired by the same real estate agent and their colleagues, you’ll need to make a good impression. Make it a point to strictly follow the turnaround time stated in your contract. Then, if possible, submit your outputs ahead of time.
These agents are also working on their own set of deadlines, so you don’t want to cause an adverse ripple effect by missing your own deadline. Even in the photography industry, word gets around. You’ll want it to make (not break) your career as a real estate photographer.

Copyright © 2019 Dong Quang. All right reserved